Using codebeat with a self-hosted repo
Setting up your self-hosted repository on codebeat
For best experience we recommend that our users log in via GitHub or Bitbucket in order to avoid manual steps required to give codebeat access to source code repositories. Both GitHub and Bitbucket offer APIs through which we can automatically accomplish the same process you will need to go through in order to start analysing your project. We realise however that there will be times where your code is hosted on a different repo provider or for one reason or another you can't link your codebeat account with GitHub or Bitbucket. This tutorial will take you step by step through the process of setting up a codebeat project linked to a self-hosted Git repository. In this example we are using Gogs but most other self-hosted solutions will require the exact same workflow.
Step 1: create a self-hosted project on codebeat
On your account dashboard page you will see three tabs, each showing projects linked to a different repo provider. You need to click on a link in the lower right hand corner of a project setup section -
please see the screenshot below.

Step 2: fill in project details
Once you click the New Project button on the project creation screen in codebeat you will be asked to provide the Git SSH URL to the repository and choose the branch codebeat should analyse. Please note that we can not pull the list of branches from a self-hosted Git repository so if you want to analyse something different than the default master branch, you need to type in the name of that branch in the field marked below.

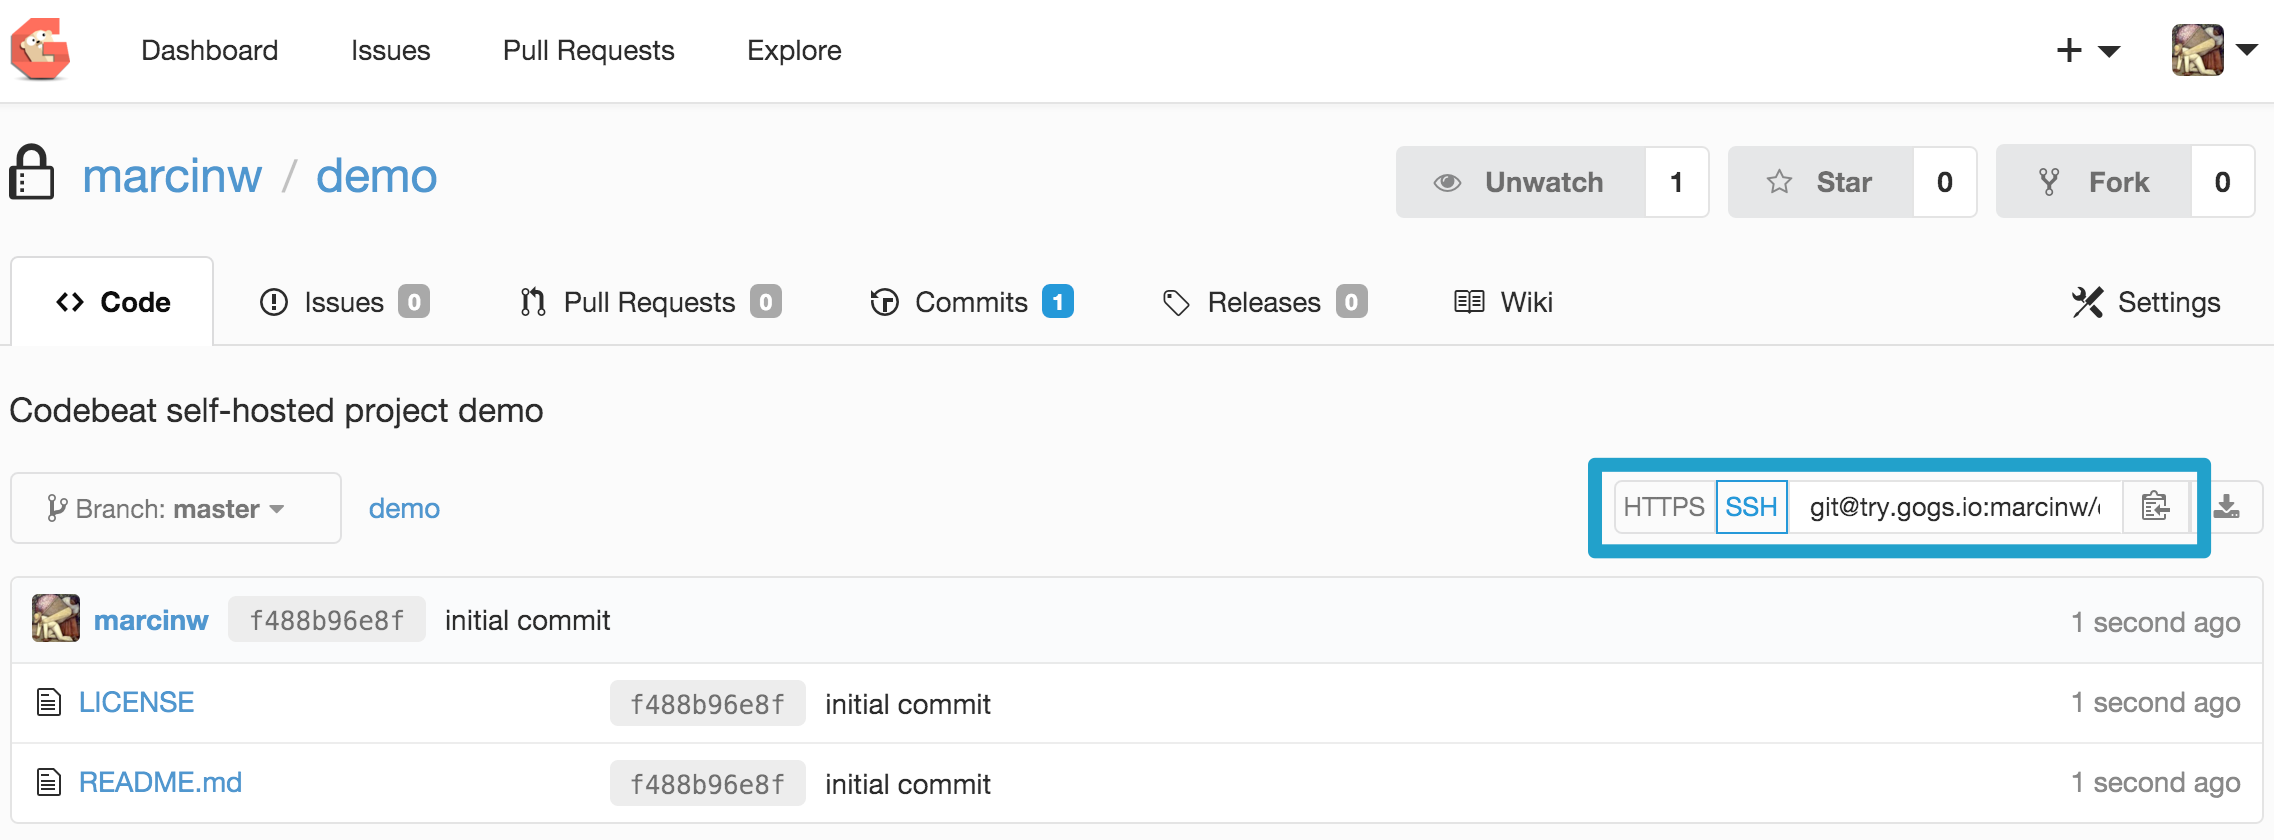
You can find your Git repository URL in your repository view. On the screenshot below you will see the URL highlighted in the repo view in Gogs. Please note that there are usually two forms of repository URLs available - HTTPS and SSH. codebeat only works with the SSH form because we need to use passwordless authentication using SSH key pair. Don't stress about it though - codebeat will detect an invalid URL and won't let you save the project.

After you've filled in the repository URL and branch name in codebeat you can click the Start Project button to move to the next stage of the project setup.
Step 3: set up deploy key
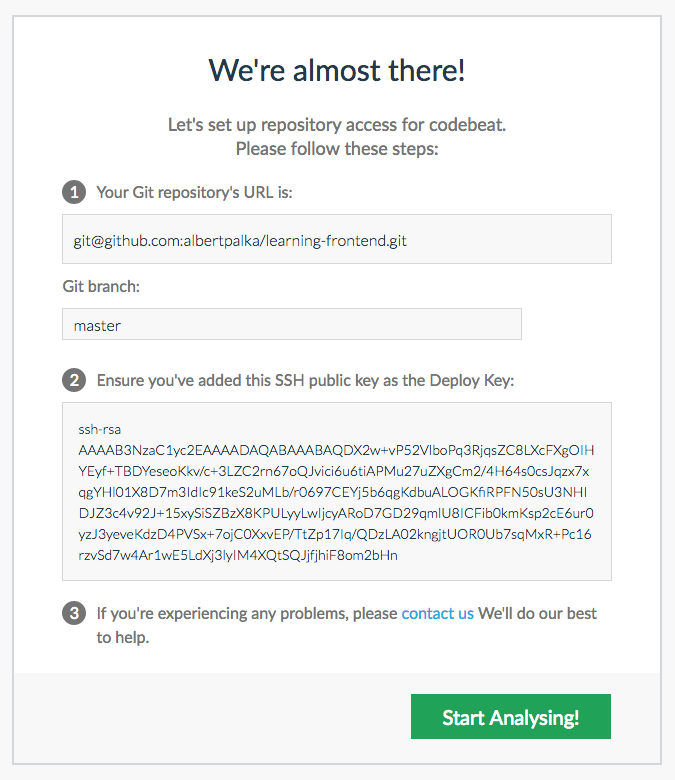
Once you click the Start Project button in codebeat you will be taken to a screen displaying your public SSH key for the project. Please select and copy it to your clipboard. It's probably a good idea to NOT click the Start Project button just yet to avoid a failed first analysis attempt as we don't yet have access to your account.

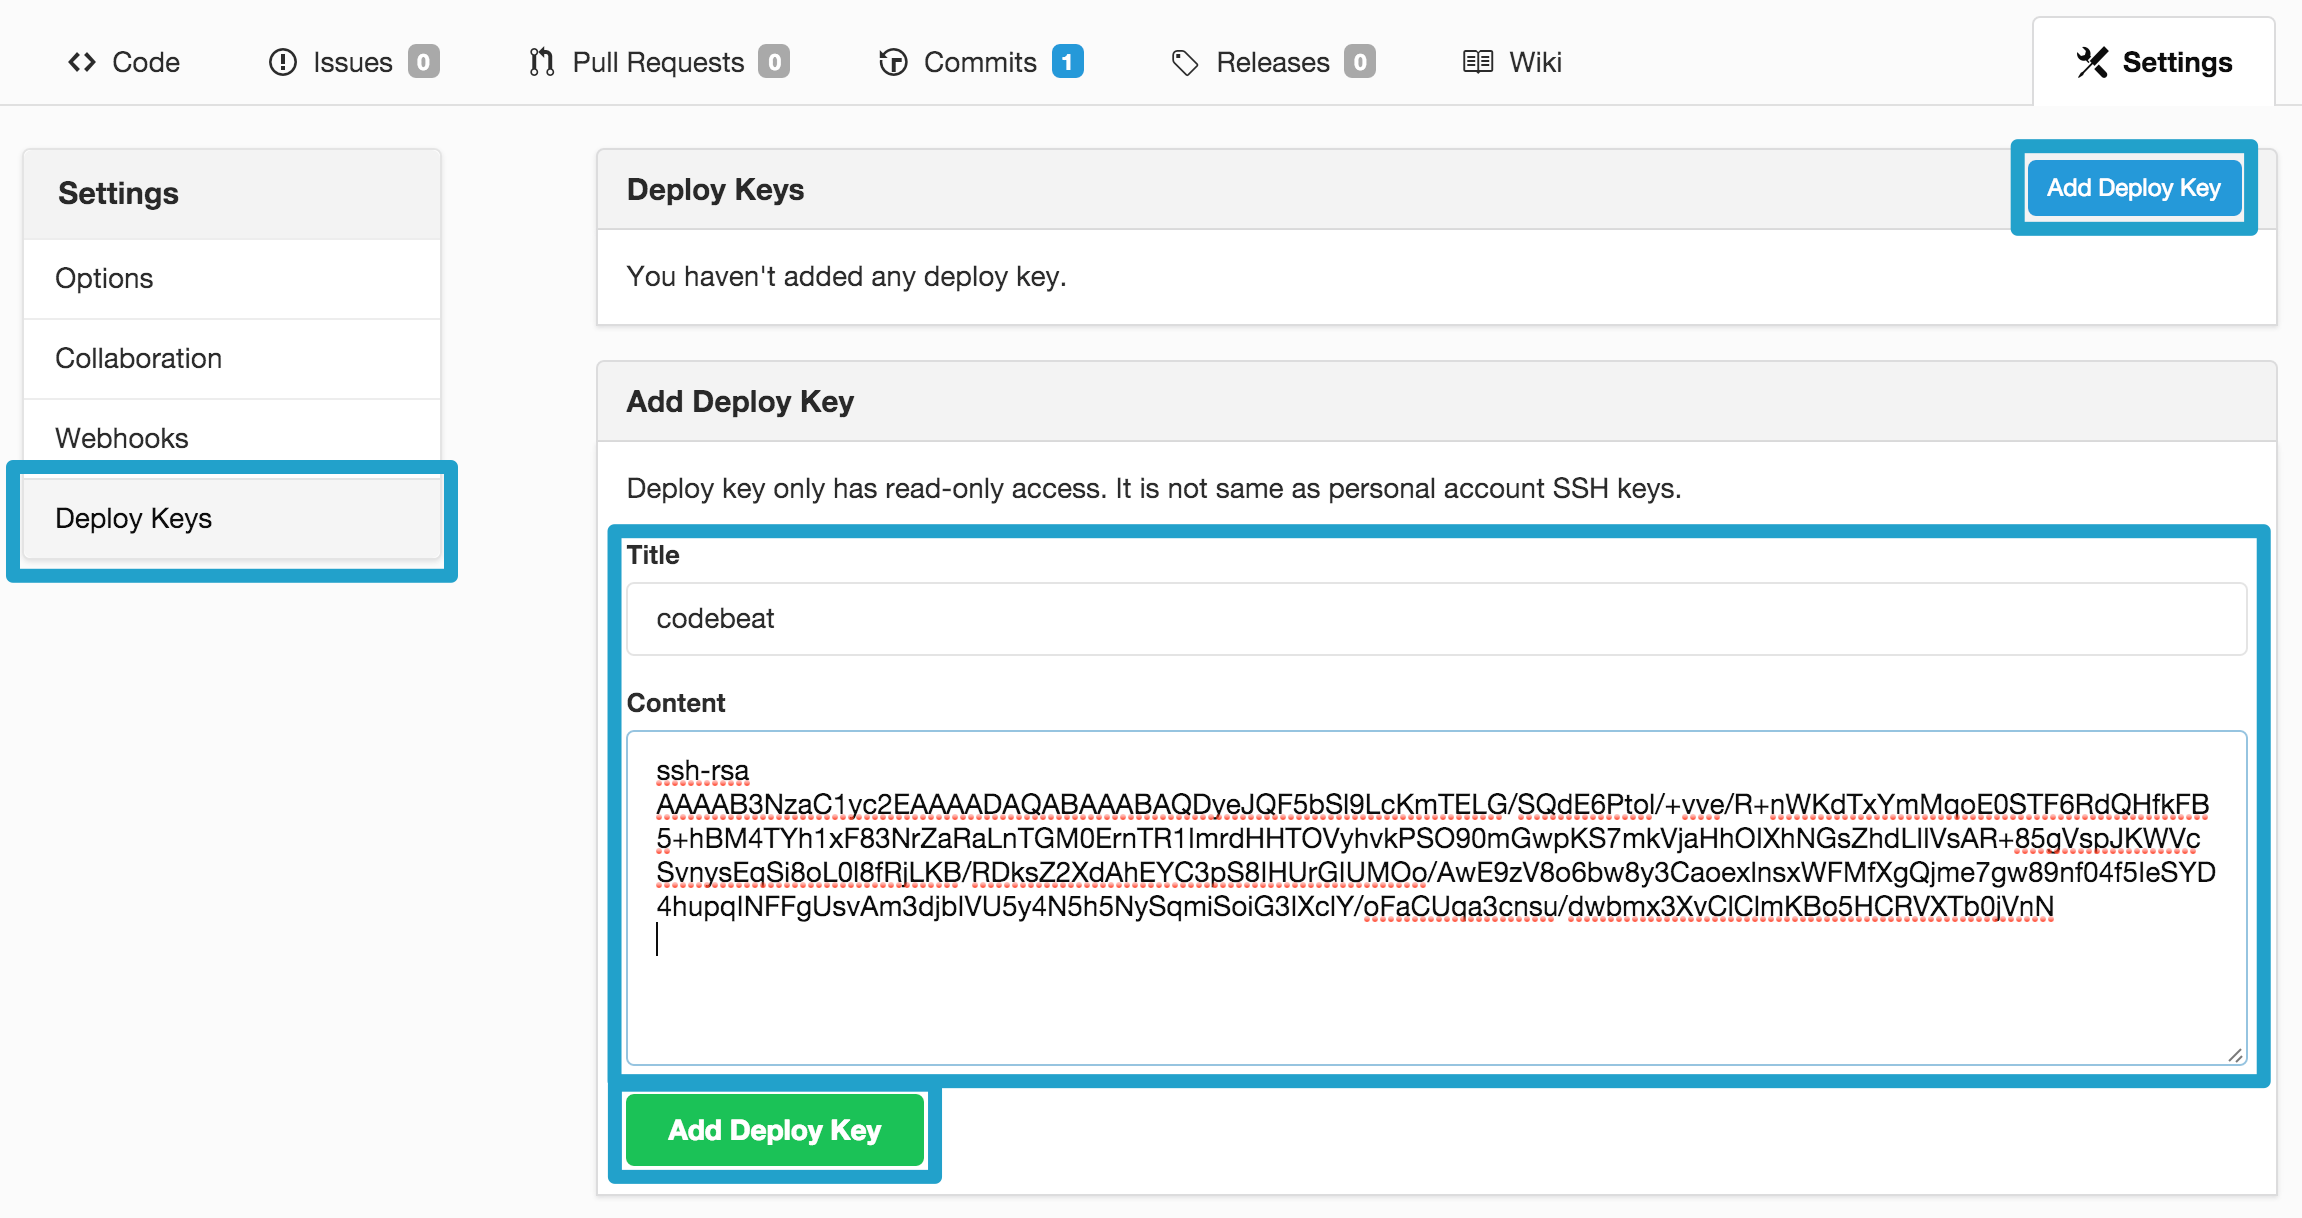
In the next step please go to the settings of your Git repository. On the screenshot below you can find the Settings link as it appears in Gogs - note that your Git hosting solution may have the link situated somewhere else.

Once on the Settings screen you will need to find the Deploy Keys section and choose to add a new deploy key. Please give it a descriptive name to identify that the key belongs to a codebeat project and paste the public SSH key you've copied from your codebeat project setup screen. Click Add Deploy Key to save this key and thus give codebeat access to your Git repository. Again please note that your particular Git hosting solution may have a substantially different UI but the whole concept should be exactly the same. For details please kindly consult the manual.

Now that your access is all set you you can go back to codebeat and click the Start Project button, sit back and wait for analysis results which should appear shortly. If you've been to eager and clicked that button already it's OK, too. Your first analysis attempt will have failed due to access problems but you can either wait up to an hour for a periodic analysis attempt to kick in or manually schedule an analysis from the project dashboard page.
Updated 2 months ago
